
Firmware Update Monitoring System 600 II
The firmware of the Didactum Monitoring System 600 II can be updated via the web interface as well as via USB stick. To find out which firmware is installed on your unit, please go to the "General statistics" entry in the German WebGUI. Here, the entry under "About the monitoring system" shows you the unit type and the installed firmware version. Alternatively, you can also find this information under "System Menu".
Notes: For security reasons, firmware and kernel updates for the Didactum monitoring hardware are only provided on request. To do so, use the contact form in the online shop for infrastructure monitoring technology. You will then receive a download link. Please also observe the notes and instructions contained in the firmware file!
01. Backup of Settings / Export of Measurement Data
You should always back up the configuration of your monitoring system before each update. To do this, go to the entry "System Menu"=>"Export" and click on "Export current settings". Select "All settings" and save the backup file. If you have not saved your sensor measurement data on an SD card / SSD / USB stick / FTP, please also export the sensor data.
02. Firmware Update via Web Interface
In the firmware package of your monitoring hardware you will find a file called "firmware.zor" (without inverted commas). Now go to the web interface under "System Menu" to the tab "Firmware". Now select the firmware.zor file under "Load Source" and click on "Load".
The start of the firmware update procedure is signalled both in the web interface (rotating circle) and directly on the front of the Monitoring System 600 II. After successful completion of the firmware update, the "ERR" LED goes out. At the same time, the "ACT" LED starts flashing at an increased frequency. If, contrary to expectations, the firmware update is not successful, the "ERR" LED remains permanently lit.
Important note: As a general rule, the cache of your web browser (Firefox/Chrome/Safari) should be deleted after the update. This ensures that there are no old cache files left in the internet browser.
Didactum Recovery / Reset to factory settings
In some rare cases, it may be helpful to reset the Didactum Monitoring System back to the original delivery status / factory settings. For example, a test sample must be reset to the factory settings before being returned.
Important note: During a complete restoration / recovery of the Didactum Monitoring hardware, all settings and the measurement data located there will be irretrievably deleted! Please always export all device settings and measurement data prior to recovery!
01. Preparation of the Micro SD memory card
The monitoring hardware is restored to its factory settings by using a suitable micro SD memory card.
Note: In the online shop for infrastructure monitoring solutions, you will find SDHC micro SD cards compatible with your Didactum Monitoring System 600 II. These offer a capacity of 32 GB and a speed of 10 or higher.
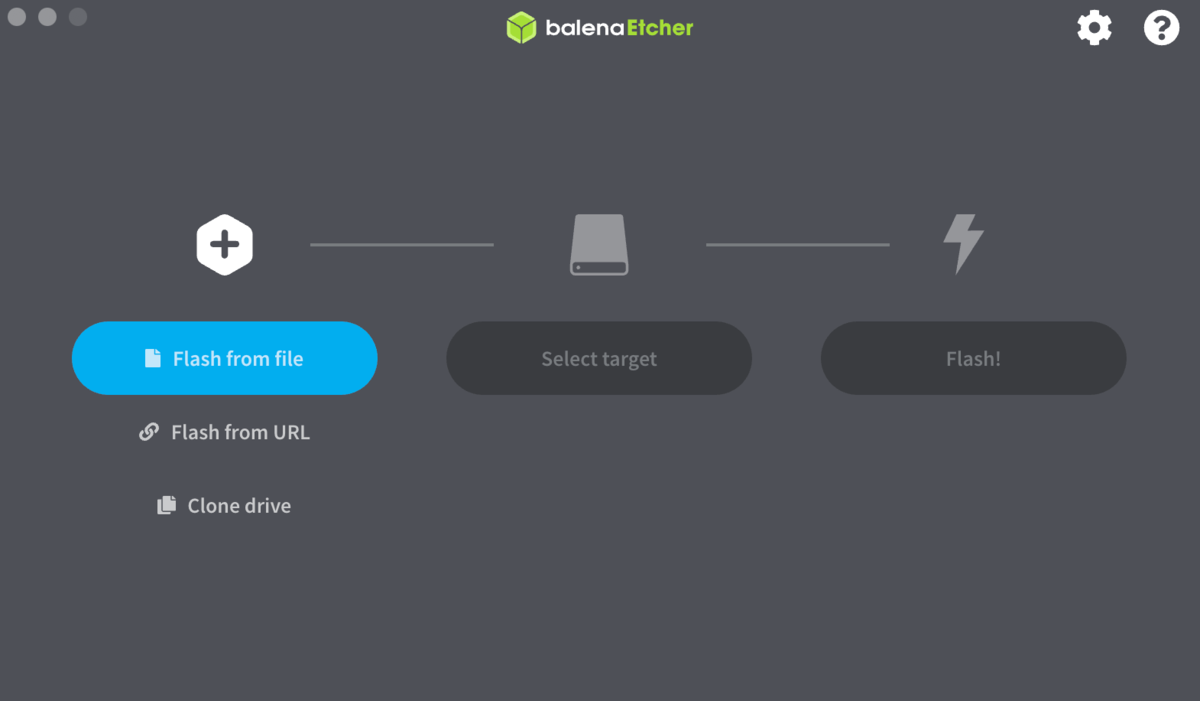
Using a special open-source tool called "Etcher", the image of the Didactum Monitoring System is written to a compatible micro-SD card. "Etcher is very easy to use. Simply insert a suitable micro-SD card into a micro-SD reader. Alternatively, some manufacturers of micro-SD storage media also supply a suitable USB adapter. Start "Ettcher" and select the image named "didactum-600II-xxxx.factory.img".
Note: "xxxx" stands for the respective firmware and cable version and "factory" for the recovery to the Didactum factory state. Then simply confirm that the image is to be written to the micro SD memory card. Please wait until the writing process is completely finished!
02. recovery of the monitoring hardware by means of a micro-SD card
Insert the card into the micro SD card slot of the Didactum Monitoring System 600 II and then press the "Restart" button. After restarting the measuring and control unit, the "ERR" LED on the front panel will automatically start flashing. This means that your monitoring hardware is being "refuelled". The successful completion of the recovery process is signalled by the flashing "ACT" LED. Now remove the Micro SD card from the Didactum Monitoring System 600 II and restart it. After the restart, the unit is accessible again under the factory IP address.
address.
03. factory setting Didactum Monitoring System 600 II
| DHCP client: | switched off |
| Host name: | didactum |
| IP address of the unit: | 192.168.0.101 |
| Network mask: | 255.255.255.0 |
| Broadcast: | 192.168.0.1 |
| Gateway: | 192.168.0.255 |
| Primary DNS: | 192.168.0.1 |
Status 04/2021