First login to your remote monitoring system
The configuration of the smart monitoring systems and PDUs from the manufacturer Didactum is done via the multilingual, responsive web interface. To access the web interface, you must enter the factory IP address of the monitoring system or smart PDU in the command line of your web browser.
Important notes: To access the web interface of the monitoring hardware, please use Google Chrome, Mozilla Firefox or Safari only. Note that if you use a web browser not approved by the manufacturer Didactum, you may experience problems with the display and operation. Please do not use the discontinued IE. Always check that you are using the latest version of the web browser.
Factory network settings
Didactum's smart remote monitoring systems and PDUs are shipped with the following default settings:
Default setting: |
|
DHCP: | off |
Hostname: | “didactum“ or“hostname“ (w/o quotes) |
IP address Didactum Monitoring Systems 50/100 (DC)/200/300/400/500 (DC)/ sowie smarte PDUs 700 / 750: | 192.168.0.193 |
IP address Didactum Monitoring Systems 600 / 700 (DC): | 192.168.0.101 |
Network mask: | 255.255.255.0 |
Broadcast address: | 192.168.0.1 |
Gateway: | 192.168.0.255 |
Primary DNS: | 192.168.0.1 |
User Name: | “guest“ (without quotation marks, lower case) |
Password: | “guest“ (without quotation marks, lower case!) |
Important note: Ex works the "guest" account of your remote monitoring unit has full administration rights! See here how to change the rights and settings of the users.
Change network address of PC or laptop
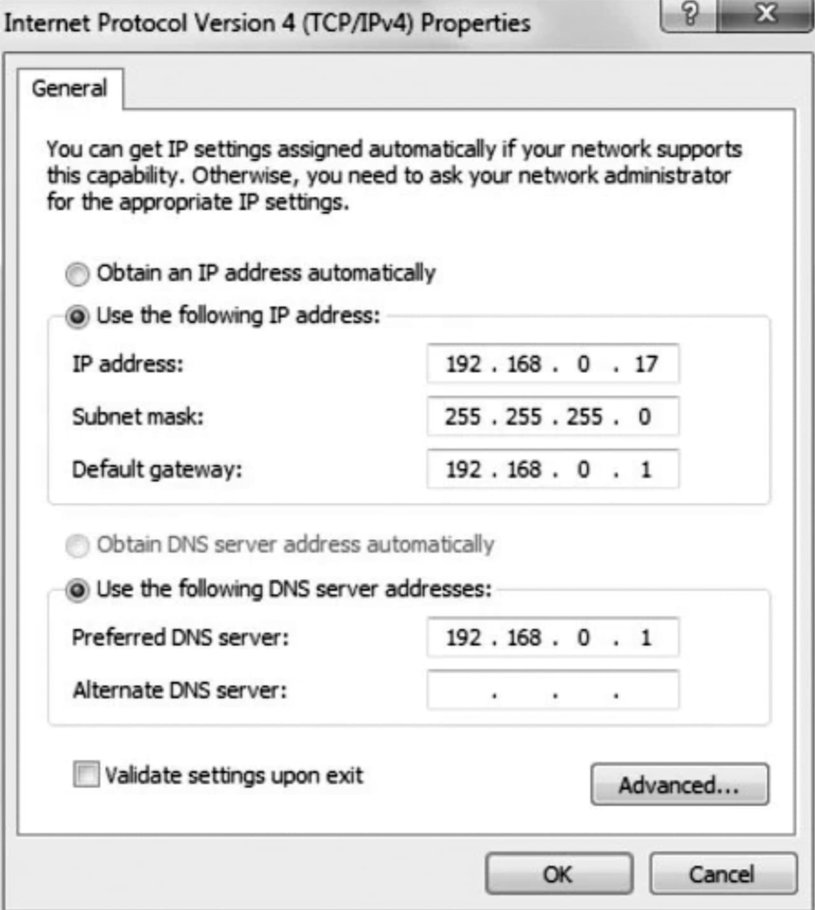
To be able to access the remote monitoring unit or the smart PDU, your PC or laptop must be in the same network. If you have a different network address on the PC, you must change the network address in the network settings of your operating system.
Under Microsoft Windows 10 please go to "Control Panel" => "Network and Internet" =>"Network" => "Change adapter settings". Here you will find the network card. Click with the right mouse button on "Ethernet properties" and then in the settings of "Internet Protocol, Version 4 (TCP/IPv4)" go to "Properties".
Enter "192.168.0.xxx" (without quotation marks) as the IP address. "xxx" stands for a number from 0 to 192 or from 194 to 254. For the subnet mask, enter "255.255.255.0" (without quotation marks). Please do not use the IP addresses "192.168.0.193" or "192.168.0.101", as these are already used by the Didactum remote monitoring unit. The screenshot below gives you more information.
Notes from the technical editors: If you have problems with the network settings of your PC or laptop, please contact your administrator or the manufacturer of your OS.


